


MCP(Model Context Protocol)は、Anthropic社が2024年11月に発表し、オープンソース化したプロトコルです。大規模言語モデルと外部ツールやデータソースとの連携を実現することを目的としています。MCPを利用することで、ユーザーは大規模言語モデルの出力を手動でコピーして実行する必要がなく、モデルが直接ツールに指示を出して対応するアクションを実行させることができます。
OceanBase MCP Serverは、MCPプロトコルを通じて大規模言語モデルとOceanBaseデータベースの連携を提供し、SQL文を実行できるようにします。適切なクライアントを利用することでプロジェクトのプロトタイプを迅速に構築でき、GitHub上でオープンソースとして公開されています。
Cursorは、AI技術を統合したコードエディタであり、Windows、macOS、Linuxを含む様々なOSをサポートしています。
本記事では、CursorとOceanBase MCP Serverを連携させ、バックエンドアプリケーションを迅速に構築する方法を紹介します。
前提条件
OceanBaseデータベースのデプロイが完了し、MySQLモードのユーザーテナントが作成されていること。テナント作成の詳細については、テナントの作成を参照してください。
Python 3.11以降のバージョンと対応するpipをインストールしていること。マシンのPythonバージョンが低い場合は、Minicondaを使用して新しいPython 3.11以降の環境を作成できます。詳細については、Minicondaインストールガイドを参照してください。
使用しているOSに応じて、Gitをインストールしていること。
Pythonパッケージマネージャーuvをインストールしていること。インストール完了後、
uv --versionコマンドを実行してインストールが成功したかどうか確認できます:pip install uv uv --versionCursorをダウンロードし、ご自身のOSに適したバージョンを選択してインストールします。なお、Cursorを初めて使用する際は、新規アカウントを登録するか、既存のアカウントでログインする必要があります。ログイン後、新規プロジェクトを作成するか、既存のプロジェクトを開くことができます。
ステップ1:データベース接続情報を取得
OceanBaseデータベースのデプロイ担当者または管理者から、該当するデータベース接続文字列を取得します。例:
obclient -h$host -P$port -u$user_name -p$password -D$database_name
パラメータ説明:
$host:OceanBaseデータベースへの接続IPアドレス。OceanBaseデータベースプロキシ(OceanBase Database Proxy、ODP)接続方式ではODPアドレスを使用し、直接接続方式ではOBServerノードのIPアドレスを使用します。$port:OceanBaseデータベースへの接続ポート。ODP接続方式のデフォルトポートは2883で、ODPデプロイ時にカスタマイズ可能です。直接接続方式のデフォルトポートは2881で、OceanBaseデータベースのデプロイ時にカスタマイズ可能です。$database_name:アクセス対象のデータベース名。注意
テナントに接続するユーザーは、データベースに対する
CREATE、INSERT、DROP、およびSELECT権限が付与されていなければなりません。その他のユーザー権限の詳細については、MySQLモードの権限分類を参照してください。$user_name:テナントの接続アカウント。ODP接続の一般的な形式:ユーザー名@テナント名#クラスタ名またはクラスタ名:テナント名:ユーザー名。直接接続方式の形式:ユーザー名@テナント名。$password:アカウントのパスワード。
その他の接続文字列の詳細については、OBClientを使用してOceanBaseテナントに接続するを参照してください。
ステップ2:OceanBase MCP Serverの設定
OceanBase MCP Serverリポジトリをクローン
以下のコマンドを実行して、ソースコードをローカルにダウンロードします:
```shell
git clone https://github.com/oceanbase/mcp-oceanbase.git
```
ソースコードディレクトリに移動します:
```shell
cd mcp-oceanbase
```
依存関係のインストール
mcp-oceanbase ディレクトリで以下のコマンドを実行して仮想環境を作成し、依存関係をインストールします:
```shell
uv venv
source .venv/bin/activate
uv pip install .
```
Cursorクライアントの作業ディレクトリの作成とOceanBase MCP Serverの設定
Cursorの作業ディレクトリを手動で作成し、Cursorで開きます。今後Cursorが生成したファイルはこのディレクトリに配置されます。例示のディレクトリ名は cursor です。
ショートカットキー Ctrl + L (Windows) または Command + L (MacOS) を使用してチャットダイアログを開き、右上の歯車アイコンをクリックして MCP Tools を選択します。
MCP Serverの追加と設定
Add Custom MCPをクリックして設定ファイルを入力します。設定ファイルに入力し、確認をクリックします。
path/to/your/mcp-oceanbase/src/oceanbase_mcp_server は oceanbase_mcp_server フォルダの絶対パスに、OB_HOST、OB_PORT、OB_USER、OB_PASSWORD、OB_DATABASE はご自身のデータベースの対応する情報に置き換える必要があります:
```json
{
mcpServers: {
oceanbase: {
command: "uv",
args: [
--directory,
/path/to/your/mcp-oceanbase/src/oceanbase_mcp_server,
run,
oceanbase_mcp_server
],
env: {
OB_HOST: "***",
OB_PORT: "***",
OB_USER: "***",
OB_PASSWORD: "***",
OB_DATABASE: "***"
}
}
}
}
```
設定が成功すると、
利用可能状態が表示されます。
MCP Serverのテスト
ダイアログにプロンプト
test 庫中有多少張表?を入力します。Cursorクライアントは実行予定のSQL文を表示します。内容を確認し、間違いがなければRun toolボタンをクリックしてクエリを実行します。Cursorクライアントはtestデータベース内のすべてのテーブル名を表示します。これにより、OceanBaseデータベースへの接続に成功したことが確認できます。
FastAPIを使用してRESTful APIスタイルのプロジェクトをクイック作成
FastAPIを使用して、RESTful APIスタイルのプロジェクトをクイック作成できます。FastAPIは、PythonでRESTful APIを迅速に構築できるWebフレームワークです。
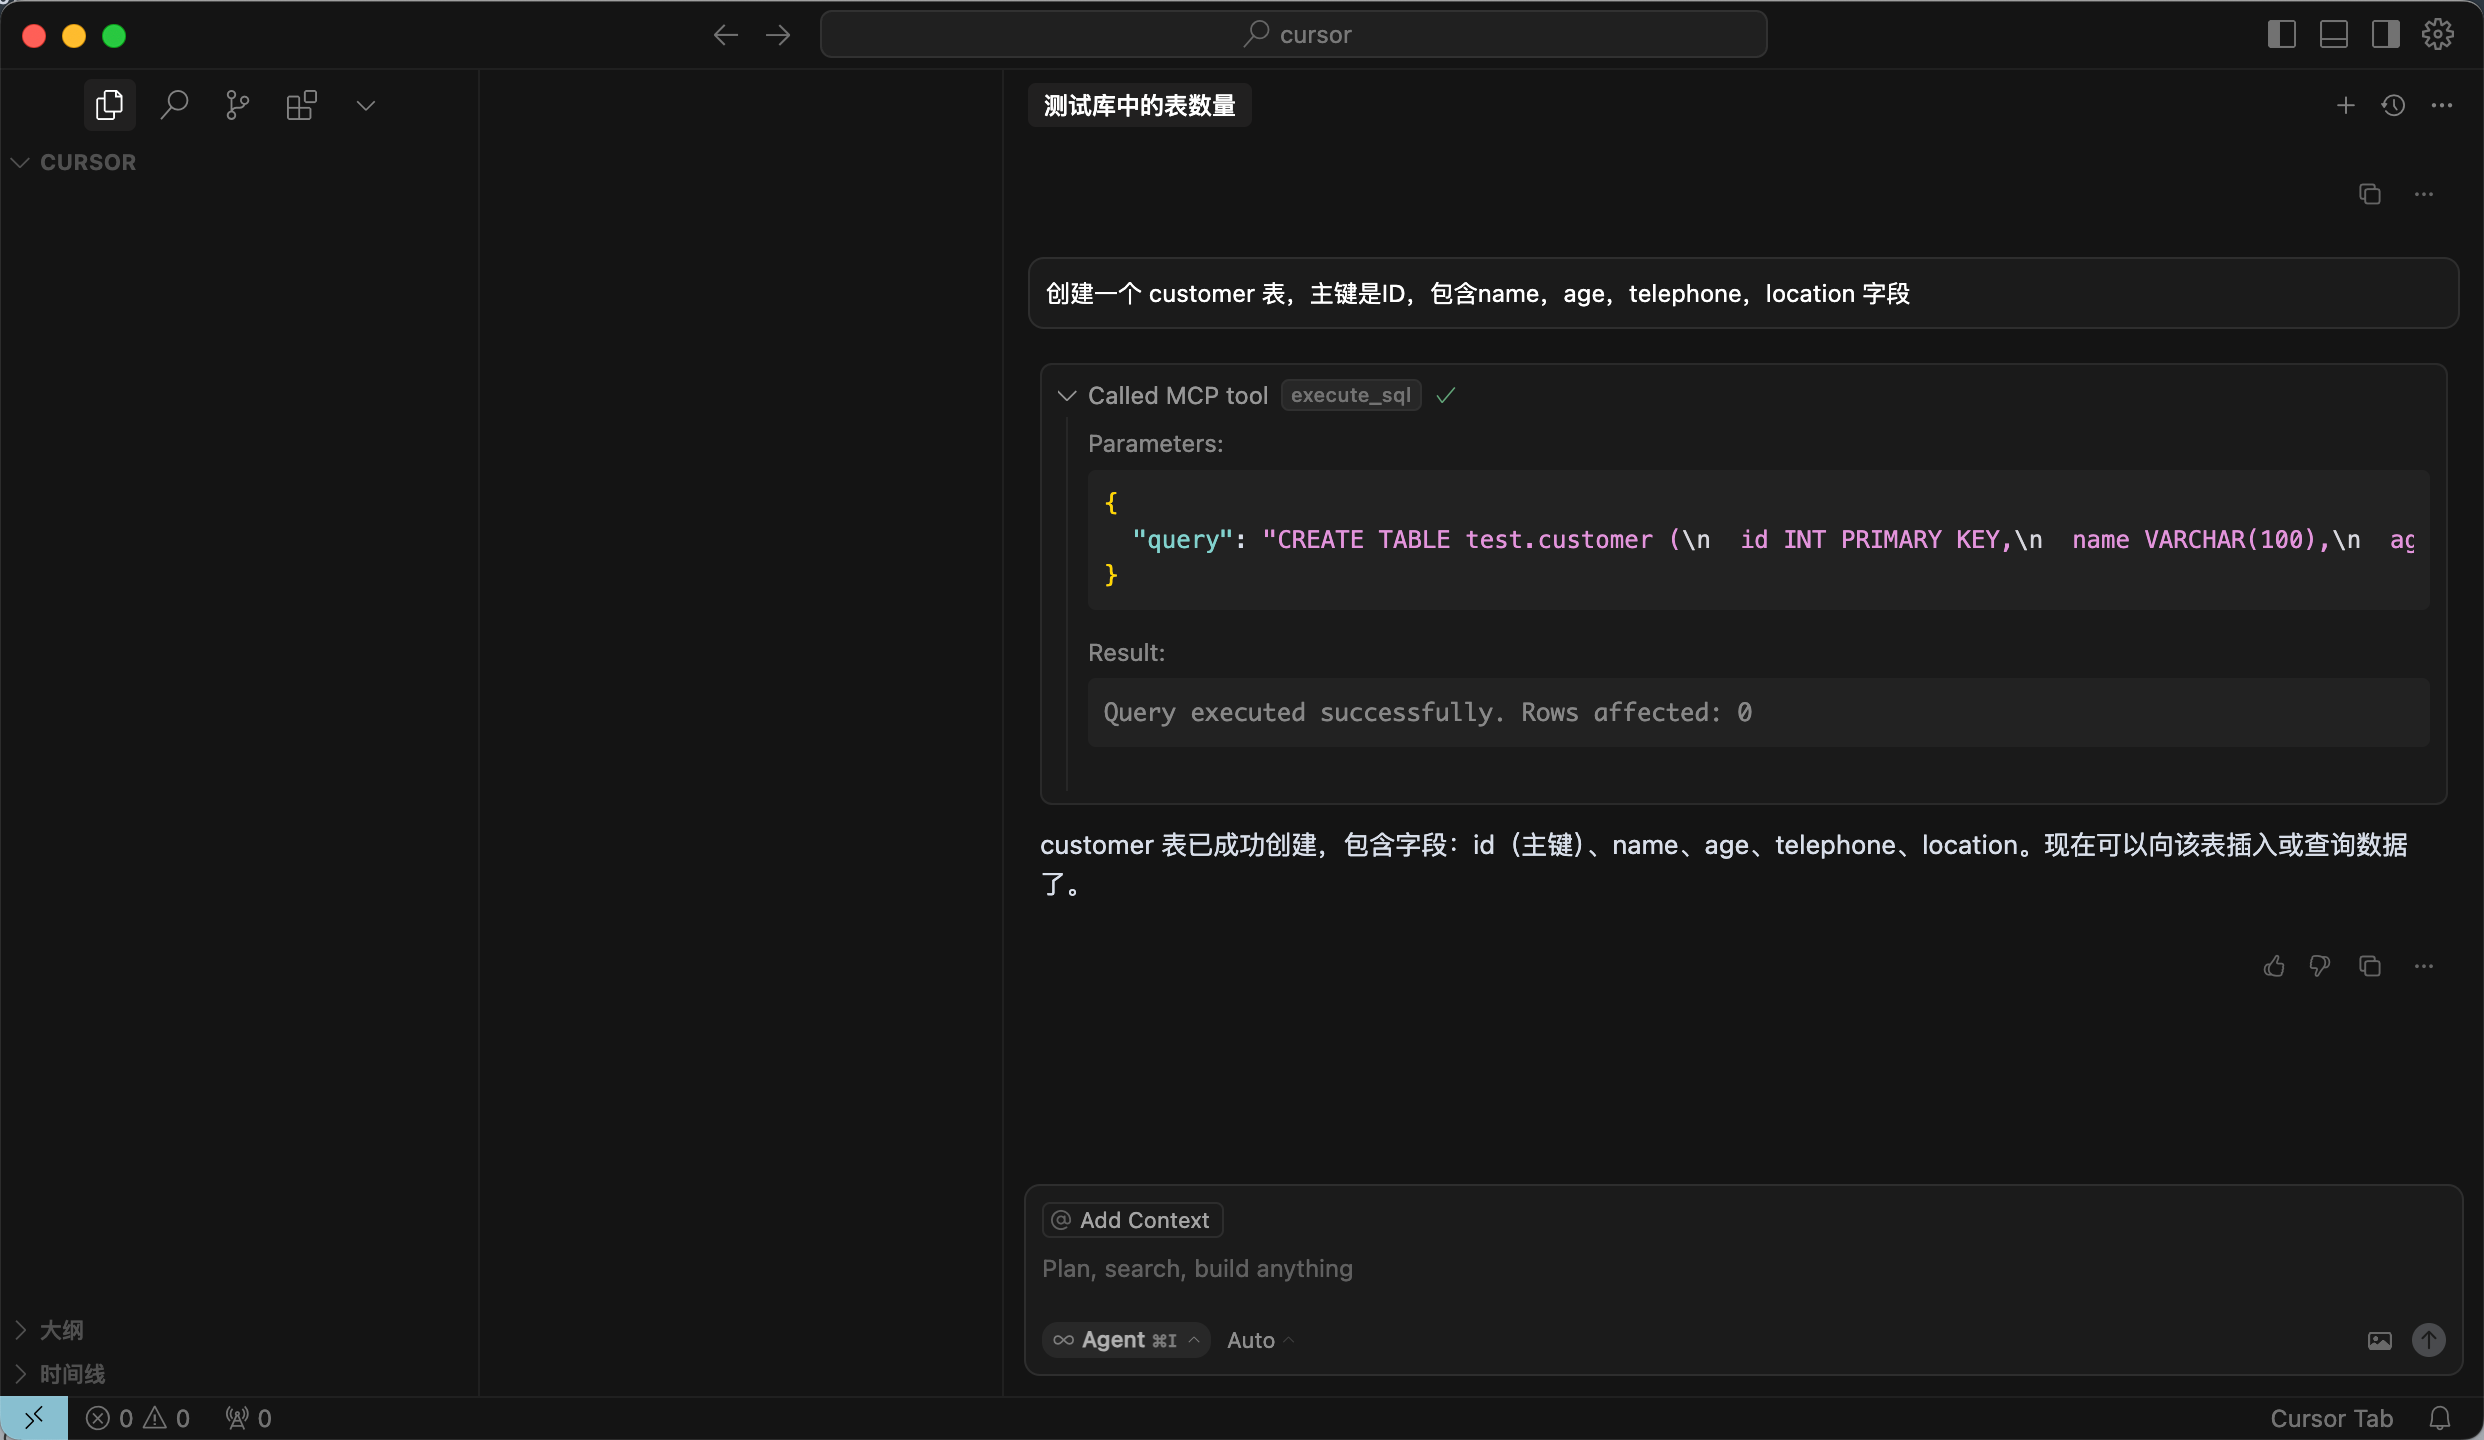
- customerテーブルの作成
ダイアログボックスに次のプロンプトを入力します:customerテーブルを作成してください。主キーはIDで、name、age、telephone、locationの各フィールドを含めてください。SQL文を確認した後、Run toolボタンをクリックしてクエリを実行します。
<!--  -->
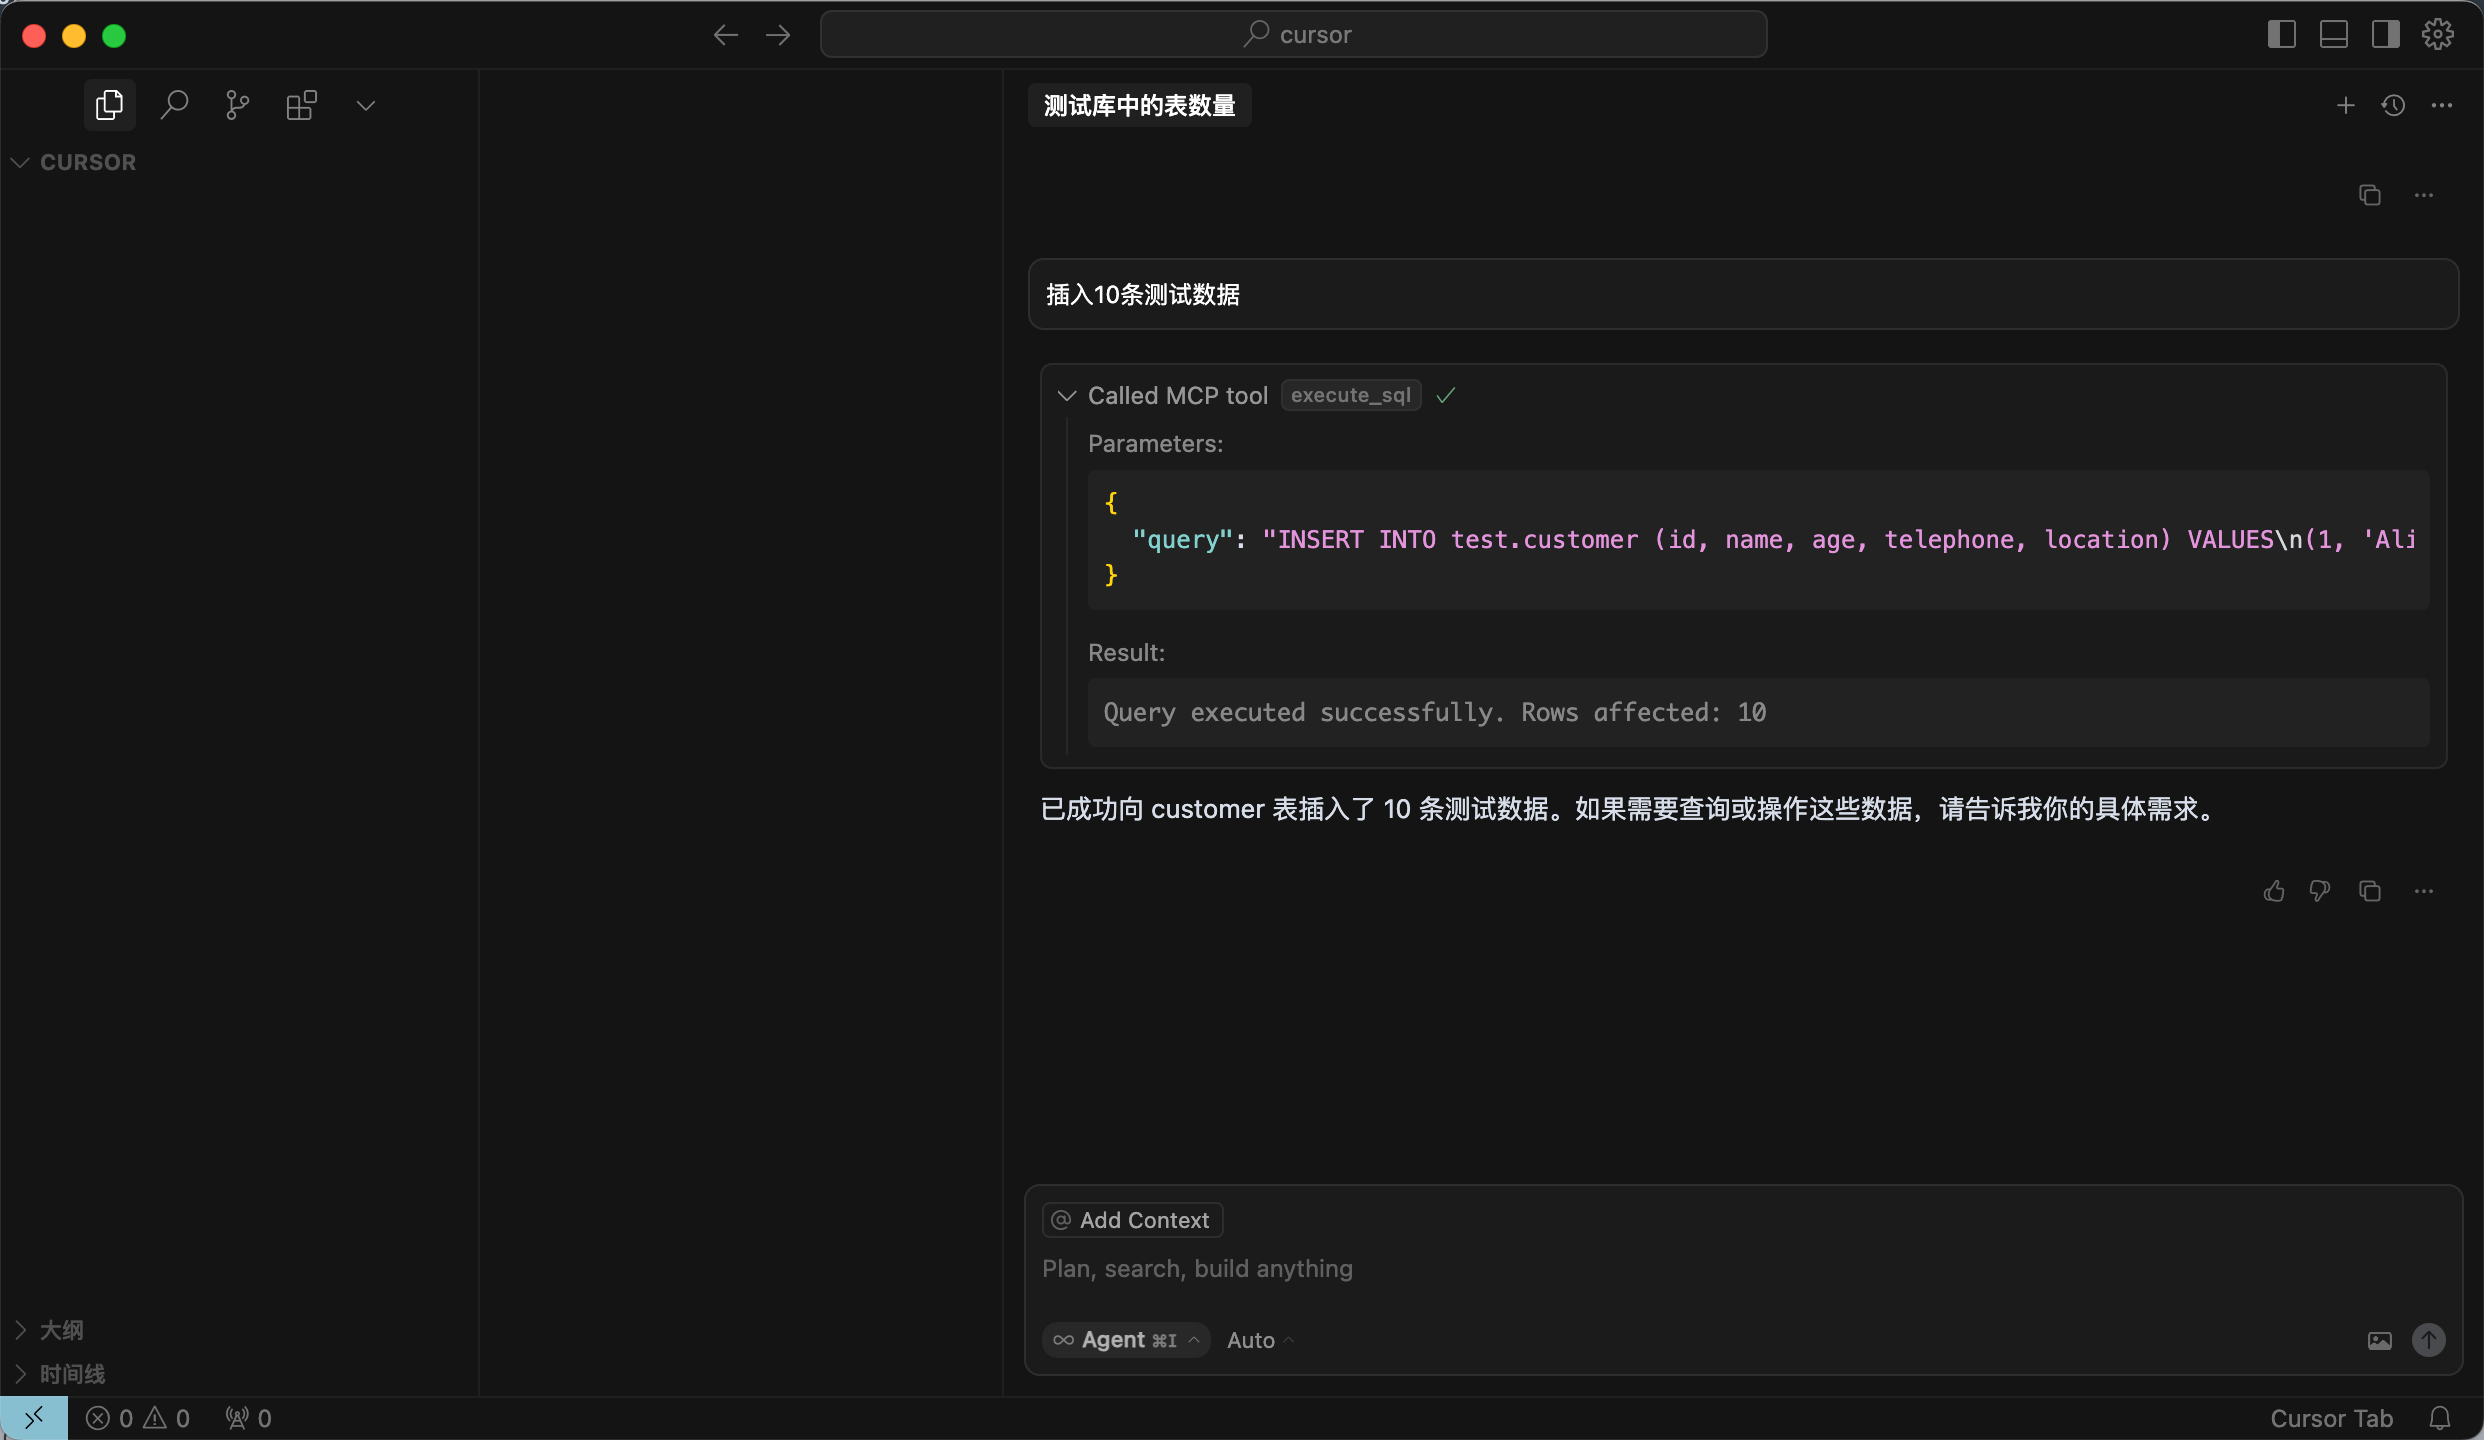
- テストデータの挿入
ダイアログボックスに次のプロンプトを入力します:customerテーブルに10件のデータを挿入してください。SQL文を確認した後、Run toolボタンをクリックしてクエリを実行します。挿入が成功すると、customerテーブルに10件のテストデータを正常に挿入しました…というメッセージが表示されます。
<!--  -->
- FastAPIプロジェクトの作成
ダイアログボックスに次のプロンプトを入力します:FastAPIプロジェクトを作成し、customerテーブルに基づいたRESTful APIを生成してください。SQL文を確認した後、Run toolボタンをクリックしてクエリを実行します。
<!-- 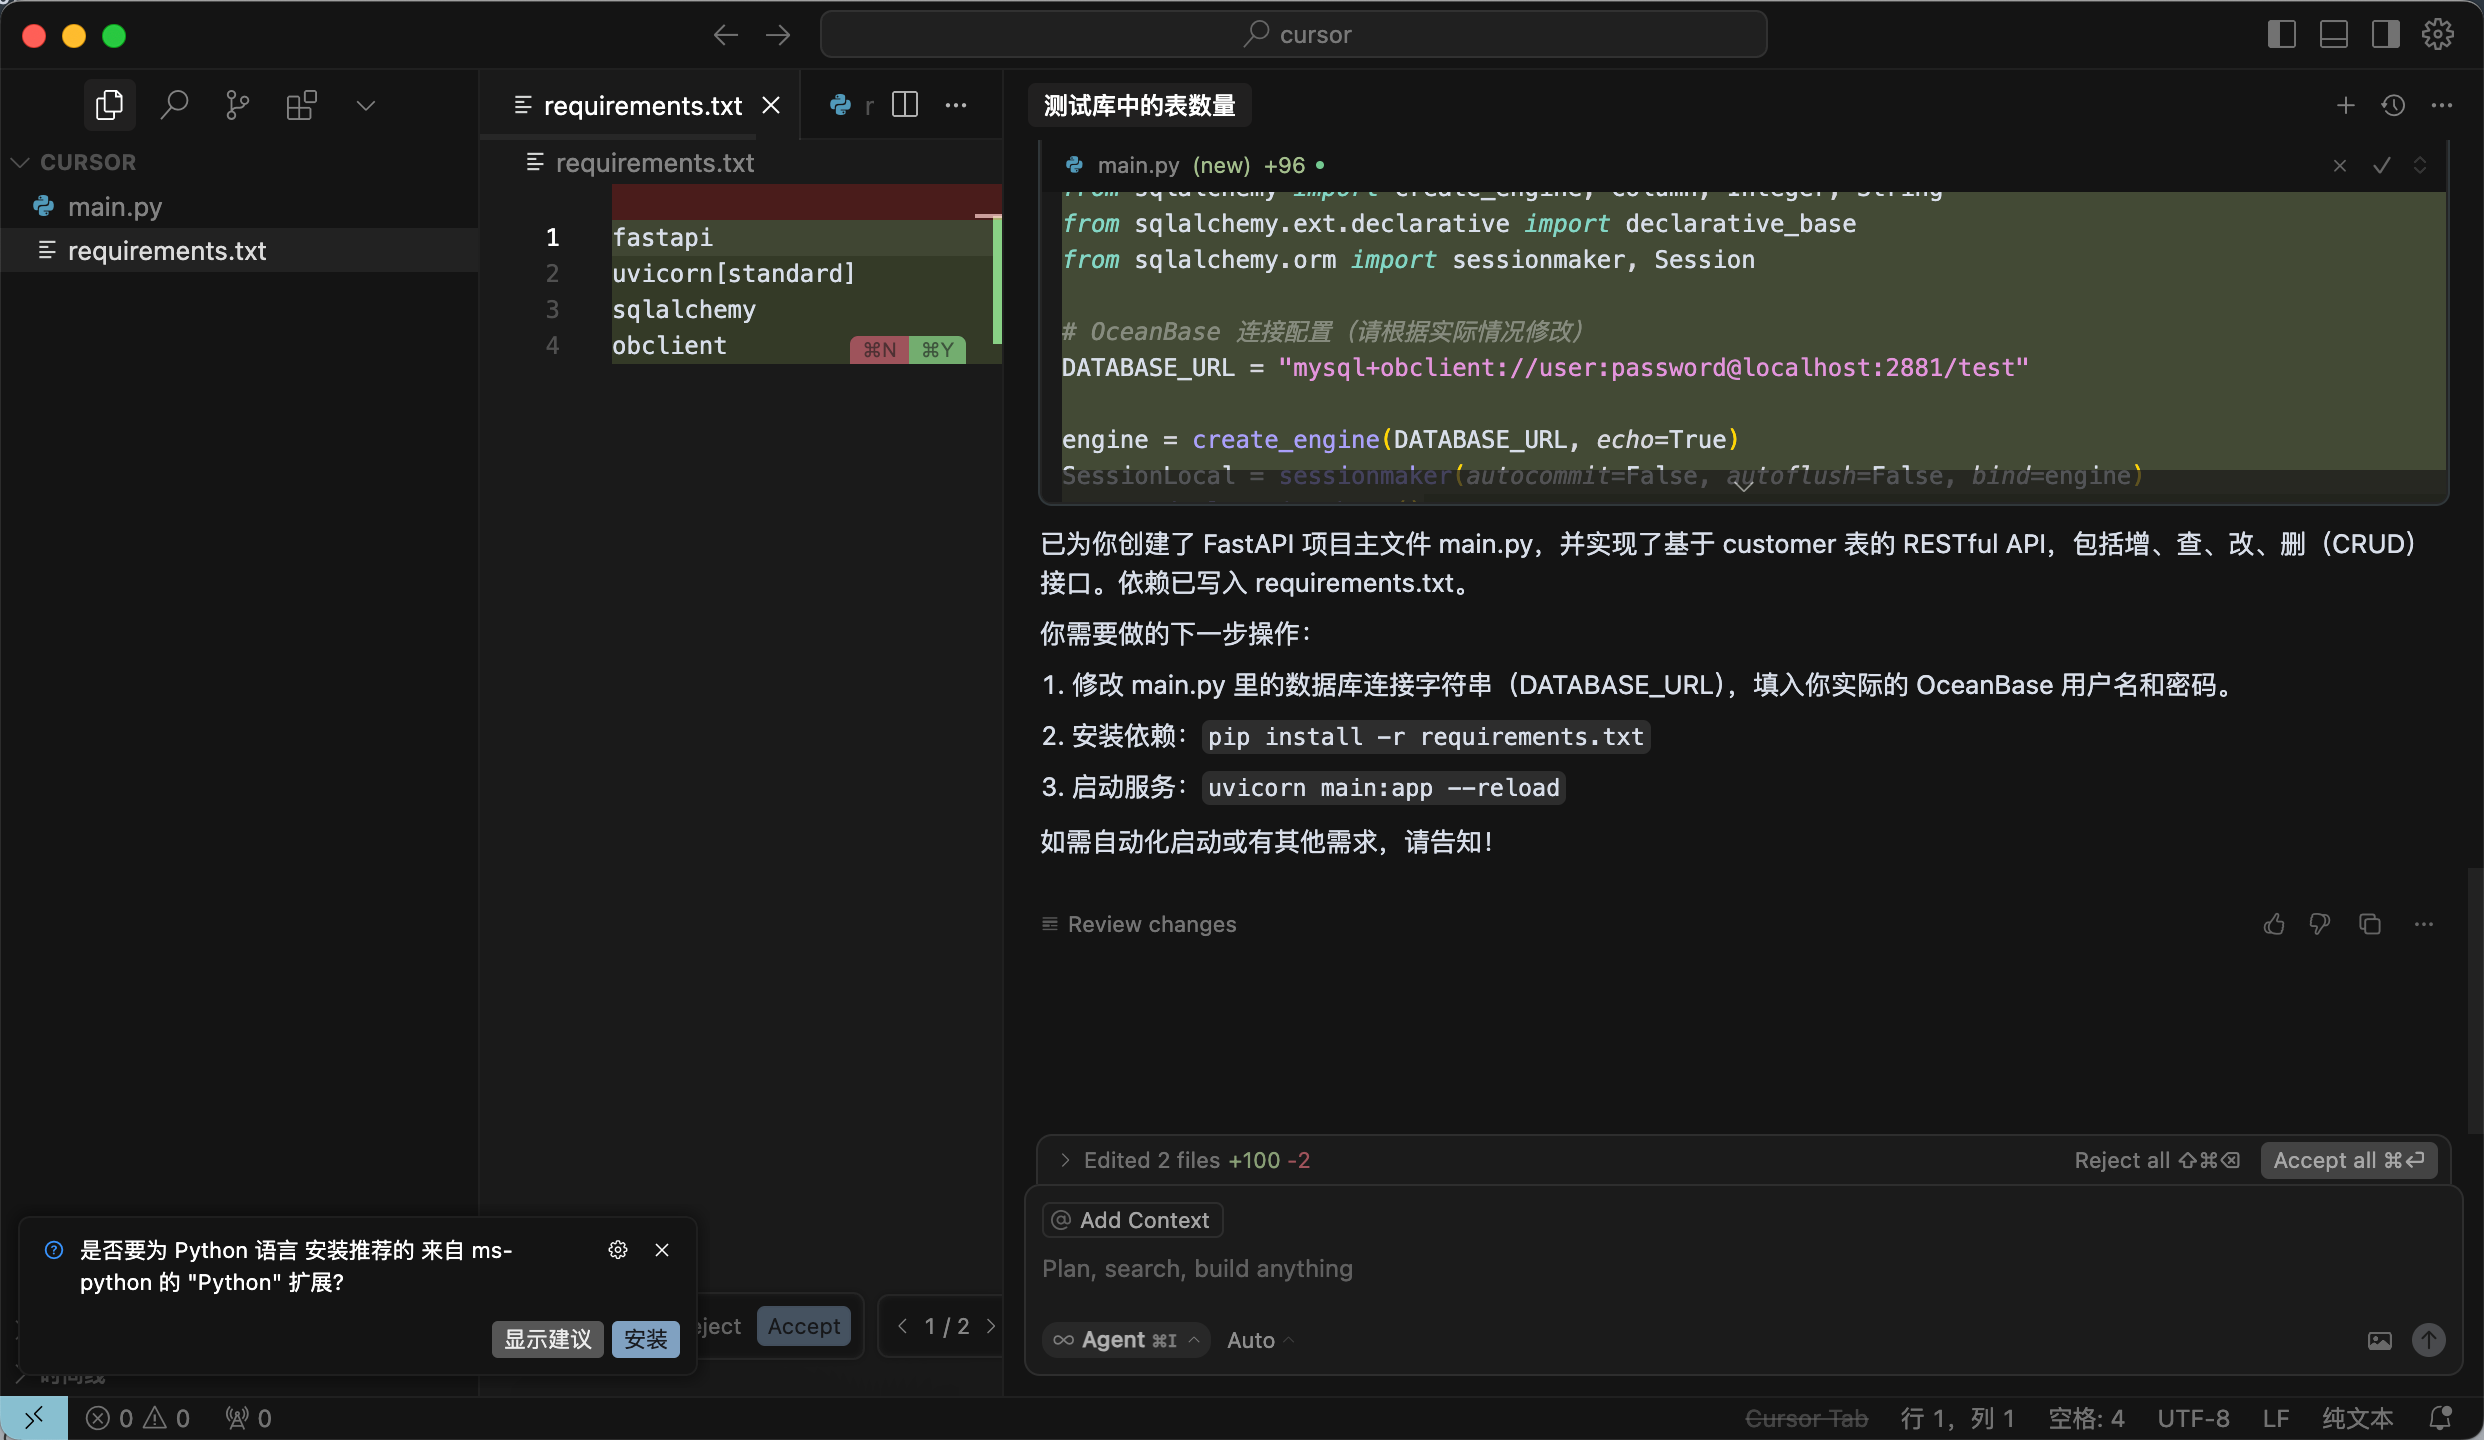 -->
このステップでは、2つのファイルが自動生成されます。AIが生成するファイルの内容は不確定な場合があるため、初回使用時はすべて受け入れるを選択し、後から実際のニーズに合わせて調整することをお勧めします。
- 仮想環境の作成と依存関係のインストール
以下のコマンドを実行し、現在のディレクトリでuvパッケージ管理ツールを使用して仮想環境を作成し、依存パッケージをインストールします:
```shell
uv venv
source .venv/bin/activate
uv pip install -r requirements.txt
```
- FastAPIプロジェクトの起動
以下のコマンドを実行して、FastAPIプロジェクトを起動します:
uvicorn main:app --reload
- テーブル内のデータの確認
コマンドラインで以下のコマンドを実行するか、他のリクエストツールを使用して、テーブル内のデータを確認します:
curl http://127.0.0.1:8000/customers
実行結果は次のとおりです:
```json
[{"id":1,"name":"Alice","age":28,"telephone":"1234567890","location":"Beijing"},{"id":2,"name":"Bob","age":32,"telephone":"2345678901","location":"Shanghai"},{"id":3,"name":"Charlie","age":25,"telephone":"3456789012","location":"Guangzhou"},{"id":4,"name":"David","age":40,"telephone":"4567890123","location":"Shenzhen"},{"id":5,"name":"Eve","age":22,"telephone":"5678901234","location":"Chengdu"},{"id":6,"name":"Frank","age":35,"telephone":"6789012345","location":"Wuhan"},{"id":7,"name":"Grace","age":30,"telephone":"7890123456","location":"Hangzhou"},{"id":8,"name":"Heidi","age":27,"telephone":"8901234567","location":"Nanjing"},{"id":9,"name":"Ivan","age":29,"telephone":"9012345678","location":"Tianjin"},{"id":10,"name":"Judy","age":31,"telephone":"0123456789","location":"Chongqing"}]
```
これにより、追加、削除、変更、検索のためのRESTful APIが正常に生成されたことが確認できます。
from fastapi import FastAPI, HTTPException, Depends
from pydantic import BaseModel
from typing import List
from sqlalchemy import create_engine, Column, Integer, String
from sqlalchemy.ext.declarative import declarative_base
from sqlalchemy.orm import sessionmaker, Session

# OceanBase接続設定(実際の状況に応じて変更してください)
DATABASE_URL = "mysql://***:***@***:***/***"

engine = create_engine(DATABASE_URL, echo=True)
SessionLocal = sessionmaker(autocommit=False, autoflush=False, bind=engine)
Base = declarative_base()

class Customer(Base):
__tablename__ = "customer"
id = Column(Integer, primary_key=True, index=True)
name = Column(String(100))
age = Column(Integer)
telephone = Column(String(20))
location = Column(String(100))

class CustomerCreate(BaseModel):
id: int
name: str
age: int
telephone: str
location: str

class CustomerUpdate(BaseModel):
name: str = None
age: int = None
telephone: str = None
location: str = None

class CustomerOut(BaseModel):
id: int
name: str
age: int
telephone: str
location: str
class Config:
orm_mode = True

def get_db():
db = SessionLocal()
try:
yield db
finally:
db.close()

app = FastAPI()

@app.post("/customers/", response_model=CustomerOut)
def create_customer(customer: CustomerCreate, db: Session = Depends(get_db)):
db_customer = Customer(**customer.dict())
db.add(db_customer)
try:
db.commit()
db.refresh(db_customer)
except Exception as e:
db.rollback()
raise HTTPException(status_code=400, detail=str(e))
return db_customer

@app.get("/customers/", response_model=List[CustomerOut])
def read_customers(skip: int = 0, limit: int = 100, db: Session = Depends(get_db)):
return db.query(Customer).offset(skip).limit(limit).all()

@app.get("/customers/{customer_id}", response_model=CustomerOut)
def read_customer(customer_id: int, db: Session = Depends(get_db)):
customer = db.query(Customer).filter(Customer.id == customer_id).first()
if customer is None:
raise HTTPException(status_code=404, detail="Customer not found")
return customer

@app.put("/customers/{customer_id}", response_model=CustomerOut)
def update_customer(customer_id: int, customer: CustomerUpdate, db: Session = Depends(get_db)):
db_customer = db.query(Customer).filter(Customer.id == customer_id).first()
if db_customer is None:
raise HTTPException(status_code=404, detail="Customer not found")
for var, value in vars(customer).items():
if value is not None:
setattr(db_customer, var, value)
db.commit()
db.refresh(db_customer)
return db_customer

@app.delete("/customers/{customer_id}")
def delete_customer(customer_id: int, db: Session = Depends(get_db)):
db_customer = db.query(Customer).filter(Customer.id == customer_id).first()
if db_customer is None:
raise HTTPException(status_code=404, detail="Customer not found")
db.delete(db_customer)
db.commit()
return {"ok": True}